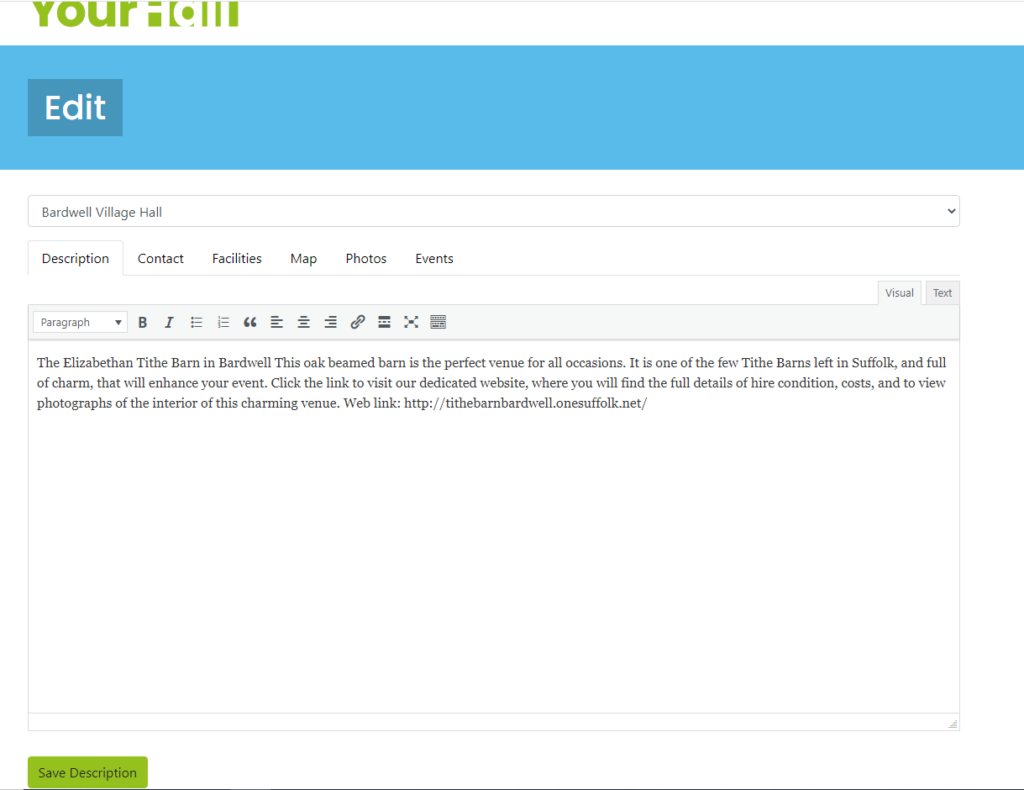
Once your hall page has been set up then click Login on the menu bar to login to the editor page. You can alternatively click on our page here
Once you are logged you will have an opportunity to edit 6 sections of information. These are listed below. A brief description of what you can do within these is also listed.

Please note: If you are an editor for multiple halls then you will see a dropdown under the Blue edit bar with all the hall pages you can edit.
- Description
A Brief description of your hall and what it offers can be edited and updated.
- Contact
The contact details for your hall can be edited and updated.
- Facilities
The list of facilities within your hall can be edited and updated.
- Map
The exact pointer location on the map, where your hall is, can be updated and edited.
- Photos
A selection of photos can be displayed on your hall page, with the ability to make one of these your “profile” image
- Events
A basic Events calendar can be displayed on your hall page. This allows you to store bookings or events that you have taken. It doesn’t currently allow online bookings to be made.
How to edit the sections
General
To edit any of the 6 sections simply click onto the tab you want to edit and use the in-built facilities to edit the section. Remember to click the green “Save” button at the bottom! Most of it should be fairly self explanatory however there are some specific notes for a couple of the sections below.
Facilities
Within this section you have the ability to detail the number of rooms you have in your hall, along with the ability to edit, add and delete facilities from your hall page. Next to each current facility there is a green delete button to delete the facility and also next to each facility there is a small move button to move the facility into the order you wish them to be. To move a facility into the order you want simply click and drag the move button next to the facility either up or down.
Photos
In this section you can upload new photos onto your hall page and also delete images, assign captions against them, and assign 1 image as your chosen profile image. There is a red trash can symbol next to each image to delete the image in question whilst there is also a caption box underneath each image. To assign 1 image as your profile image simply click the small heart symbol on the image.
